Kamis, 25 April 2013

How to Install Application Program in Linux Ubuntu

Installing applications in Ubuntu is easy bother not like the way Windows install it just double click the file *. Exe. How to install applications in Ubuntu there is a need to connect to the internet there is no need to connect to the internet but have to download the installer file with the extension *. Deb. But the problem is that the installer application *. Deb inclined slightly.

Here are two ways to install applications in Ubuntu that I know of.

1. If the Connect to the Internet (Online)
This method is used when we are connected to the internet Ubuntu. This method tends to be easier and more complete applications available. before installing, we must first set our repository to a local repository so that faster connections. Follow these steps to change the following repository:
Open Ubuntu Software Center, click Menu Edit -> Software Sources ...


On the Download From: select Other and select a server repository .
Then click the Close button
Update the repository with a way to open a terminal and type sudo apt-get update and press Enter, enter your Ubuntu password and wait a few moments until the process is complete.


Well after the update we just select the apps that we will install, how to install applications in Ubuntu with this online way there are 2 ways that I know of that is with the Terminal or the Ubuntu Software Center, here\'s how.

Using the Terminal
If using this method means you have to know the name of the application to be installed
Open a terminal (Ctrl + Alt + T) and type sudo apt-get install Application_name


Wait a while until the installation is complete.

Using Ubuntu Software Center
This method tends to be easier when compared to the way Terminal as we can find and choose the applications directly. here's how:
Open Ubuntu Software Center and select the application to be installed, you can select the application in the category menu on the left side


Select the application you want to install and click the Install button


Wait a few moments until the application is installed on your computer.

2. When Not Connected to the Internet (Offline)
This way we do not need to set up a repository for easy installation method, but the difficulty is the difficulty of finding an installer program with extension *. Deb. the following way:
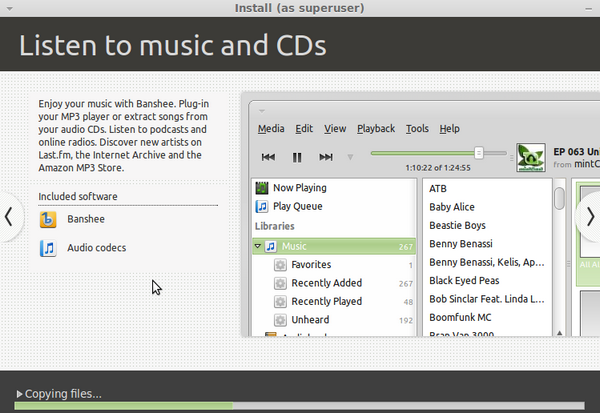
Double click the file *. Deb that we were looking for and downloaded from the internet.


After that, click the Install button, enter your password if necessary, and wait for the process to complete.


Website address that can be used as a place to download the installation file (*. Deb) one of which is Appnr. Well, how convenient right? enough of this simple tutorial, may be useful.

How to Install Ubuntu Linux with flash (usb)

Install Linux

How to Install Ubuntu Linux with flashdik - Ubuntu, once I explained what it was Ubuntu on my posts earlier. If you\'ve Downloading Ubuntu Linux but do not know how to Installing it, I know how to in install ubuntu linux Through 3 Media: 1. On DVD 2. Through the flash 3. Through Windows, in Between the 3 I mentioned earlier, I chose the second one is passing through the flash because the flash somewhat faster than passing through the windows DVD if it our windows were missing. Now We Make installer.

how:
1. 12:10 First download the Ubuntu Linux Desktop here. (I chose the link that 32bit v12.10)
2. Download Pen Drive Linux\'s USB Installer here.
3. After you download the file, open the Universal-USB-Installer-1.9.1.5 Approval page will appear click I Agree.

Install Linux 1

4. Once you click I Agree, it would appear the selection and type of Linux versions that you want because I want to make the installer Ubuntu Desktop 12:10 Click 12:10 Ubuntu Desktop.

Install Linux 2

5. Click \'Browse\' to locate the ISO file of Ubuntu or Linux Ubuntu Installer that have been downloaded, in Step 3 select your flash you want to make the Ubuntu installer. (Recommended you have a FAT32 formatted flash because the copy process will be quick)

Install Linux 3

6. Click Create to run Ubuntu Linux Installer-making process, if there are questions just click yes.

Install Linux 4


Install Linux 5

7. Just let the process run when done click close.

Basic command in Linux terminal

With the increasing growth of Linux, today Linux programs with a view that supports GUI (Graphical User Interface) more and more. With a GUI (Graphical User Interface) so that users increasingly easy to operate. The consequences of the use of the GUI in Linux is of a system, especially a computer with minimum specs old school.
Mekipun GUI has been circulating, via terminal commands use linux sometimes we can not avoid. In some cases the use of linux terminal is absolute. This is encouraging for us to know the basic commands in linux terminal.
For starters, here are some basic commands used in Linux, among others:
man
  This command is used to display the manual page or the help of a command. Format of writing man, the man command so help us to walk in the linux terminals.
Man man example will display the manual pages from man.
pwd
Stands for present working directory, used to see the full path of the directory that are currently active.
ls
This command is used to view the contents of a directory. Consumer ls / path, the path can be either absolute or relative address, if used without argument / path will display the contents of the current directory.
mkdir
True to its name which is short for make directory, this command is used to create directories. Write regular run mkdir / path, if the argument / path instead of an absolute address of the directory that will be made relative to the current directory. Example mkdir / home / userkamu / try try directory will result in the user\'s home directory userkamu.
CD
Its name is inspired from the change directory, is used to move from one directory to another directory. The argument used is the address of a directory, either relative or absolute. If used without arguments it will call the directory $ HOME. Example cd / etc/X11 will move the active directory to / etc/X11. There are two arguments for this command is privileged. and .. because cd. will call the directory itself and cd .. will move to the parent directory (up one level).
rmdir
His real name is remove directory, is used to delete directories. But it will only remove empty directories. The other brother format it can be used with rmdir / path.
mv
mv / path / home / path / destination will move a file or directory path from origin to destination. Can also be used to rename a file, the condition / path must be the same.
cp
To copy a file path from origin to destination path run the command cp / path / home / path / destination. Unlike the mv which will destroy their home, cp will maintain it so it will be the same two files.
rm
Derived from the word remove, used to delete a file with the command rm / name / file, can also be used to remove non-empty directories with include option-rf.
du
Retrieved from disk usage, used to estimate the disk space usage, the data will be displayed per file. If used without arguments will display the disk space usage in the active directory. Authoring format du / path / target. Use the-h option to display the results easier to read.
df
Disk free, used to see the capacity of the disk is still empty / free. Use the-h option if you want the results more pleasing to the eye.
clear
Self titled, used to clean the terminal (screen).
ps
Displays information about the currently active processes / running in the system. There are many options that can be given to this command, one of which is the aux which will show the entire process in the system.
top
Almost the same as the top ps will only show information that is always up to date and dynamic.
paint
Derived from the word concatenate, used to display the contents of a file to standard output (usually the screen). Executed by typing cat / name / file.
echo
Usually used to display strings / characters on screen, but can also be used to create a file by using output redirection.
The commands above are just some of the very complex commands contained in the Linux world. Similarly, explanations, arguments, and options described are just a few of the dozens and even hundreds of arguments and options for each command. The easiest way to get an explanation of the command is the opening page of the manual.
Okay .. so first yes our roads in linux terminal today. hopefully turtorial on Basic Commands in Linux terminal can be useful for you.

How to Install Linux Mint 13 Mate

Is long in the release of Linux Mint 13, but I share a tutorial how to install Linux Mint 13 (Mate). Like most other Linux distributions, Linux Mint installation process is also quite easy, I think even easier than installing windows.

Linux Mint 13 is already include multimedia codecs, so once installed directly buddy can play various audio files and video. Linux Mint 13 also has menyartakan several built-in applications such as GIMP for image editing, Libreoffice replacement for ms office, VLC for multimedia play, Movie Player, Document Viewer, calculator, notepad replacement gedit, firefox for browser, domain blocker, firewall, and more .

Usually all computers drivers mate is instantly recognizable with so my friend does not need to be complicated to install the driver again. If the driver also had to be easy to install, just open the menu Additional Drivers, and install.

To download Linux Mint 13 (LTS) here http://www.linuxmint.com/release.php?id=18
Here\'s how to install Linux Mint 13:


Select Install LinuxMint
Choose a language


Choosing your system default language, if I choose English.

Check the requirements before installation pass


Warning to 2 should not be done if your laptop battery is sufficient, whereas memorial to 3 should not be done. Continue by clicking Continue.

Selecting the type of installation


Here I choose to Option 3, because I will dual boot with windows. Select Options to 3, and then click Continue.

Make the root partition (/)


The root partition will be used as the system files.
Click the free space, and select Add.


I allocate the size of the root partition (/) of 5 GB. Primary partition type, format ext4 partition and mount point on (/).

Next up is a swap partition. The actual swap partition is optional, if your RAM is not large you may need to use a swap partition.


If it is then you will see the following.


Make sure the device for boot loader installation, bootloader installation location gentleness in / dev / sda. If you already choose Install Now.

Select a time zone


Selecting a keyboard type


Creating a user


Next will come a slideshow that tells what can be done in linux mint 13\'s, wait until the installation is complete


install completed.


Select Reboot Now.


So this tutorial, on How to Install Linux Mint 13 Mate, hopefully this article useful for you.
Good luck ^ _ ^

Rabu, 24 April 2013

How to use Linux and Windows simultaneously

How to use Linux and Windows simultaneously

One way to run more than one operating system on a single computer at the same time is to use a Virtual PC software from Microsoft. If we insert the Ubuntu CD and immediately start the Virtual Machine that we created, then the graphic display that appears will not look well.

Besides the mouse is also not working. After pacing around the internet, information about Ubuntu Linux that I was looking for instead I found on Microsoft\'s MSDN blog address at http://blogs.msdn.com/mikekol/archive/2007/08/06/making-ubuntu- 7-04-work. If you want to learn Linux but do not want to abandon Windows, or vice versa already familiar with Linux, but occasionally still need Windows, you can install the Linux and Windows at the same time on one computer. The term is a dual boot (or even triple boot).

The disadvantage, in this way if you want to switch from Windows to Linux or from Linux to Windows, you must restart your computer first. You can not run Windows and Linux simultaneously. Another way is to use virtual machine software. Examples of virtual machine software is Microsoft Virtual PC, VMware, Bochs, QEMU, VirtualBox Sun Microsystems, and so on. By running virtual machine software, you can get a new computer that will be virtual (not real computer).

The virtual computer is actually a program that is run on the original computer. This virtual computer you can fill with any operating system and may differ from the original computer. This is usually called a virtual computer with the guest while the original computer is called the host. It could be a host computer using Linux, and Windows computers guestnya use. Or vice versa. Or both are using Windows or Linux. Host computer with guest, both can run simultaneously. So with your virtual machine as if it could run multiple computers simultaneously (and with different operating systems can) even though physically you just wear one komputer.Hanya virtual machine just to use the computer you need a larger memory than using a dual system boot because the total available memory should be divided for each virtual computers that run.

The amount of memory needed depends on how many virtual computers are going to be running simultaneously. Now back to the problem I encountered when trying to install Linux Ubuntu 7.04 on Microsoft Virtual PC 2007. Hosts that using Windows XP. Microsoft Virtual PC installation is quite easy, just download the software from http://www.microsoft.com/windows/products/winfamily/virtualpc/default.ms ..., then run to completion. The problem emerged when I tried to boot the virtual machine with Linux Ubuntu 7.04 CD. But after following the instructions in the http://blogs.msdn.com/mikekol/archive/2007/08/06/making-ubuntu-7-04-work ..., finally successfully installed Ubuntu 7.04 Linux well.

In brief, the steps undertaken are: * Installing software Microsoft Virtual PC 2007 on Windows Virtual PC * Run * Create a new virtual machine * At the time of the first appearance of Ubuntu appears, press the F6 keyboard. Add i8042.noloop at the end of the line, and then press Enter. * After entering graphics mode, zoom still be a mess (not clear). To fix it: o Press CTRL-ALT-F1 to go to console mode. o Type sudo nano / etc/X11/xorg.conf and then press Enter. o Press CTRL-W, depth type and press Enter. Will be seen writing \"DefaultDepth 24\". Remove and replace the numbers 24 to 16. o Press CTRL-O, and then press Enter to save the file. o Press CTRL-X to exit the nano editor. o Press CTRL-ALT-F7 to get back to XWindows - got here is still a nice graphic display. o Press CTRL-ALT-Backspace to reload XWindows. Graphic display would be nice. * Once it\'s done installing Ubuntu to completion. * After installation is complete and the virtual machine is restarted, Ubuntu graphical display would be nice, but the mouse is still not working. In order to function, we must add the kernel parameter in RUB loader, by the way: o Go to the Ubuntu installation is the result. o Press CTRL-ALT-F1 to go to console mode. o Type sudo nano / boot / grub / menu.lst and then press Enter. o Press CTRL-W default options then type end and press Enter. o Locate the line that begins with kernel, and then at the end of the line add i8042.loop o Press CTRL-O, and then press Enter to save the file. o Press CTRL-X to exit the nano editor. o Type sudo reboot and press Enter to reboot the virtual machine.